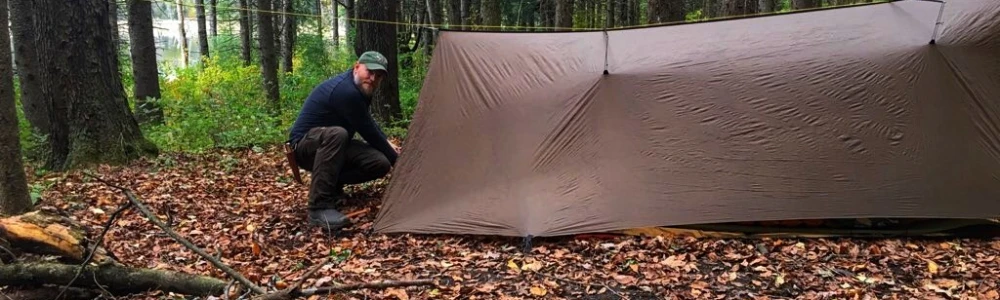
Tarp Shelter Trick

If you have ever camped using a tarp in the wind, then you know the stress wind can place on a tarp and it’s tie out points.

I generally always use shock cord to attach stakes to me tarps. This allows some free movement of the tarp when the wind picks up a bit but I have a trick I’ve been using for years that helps on those strong windy days when it feels like your tarps going to rip and blow away.

Something simple, that I’ve done for along time, is to take some thumb thick sticks and make a toggle for each corner and then to use a stick long enough to reach all of the stake out points along the edge being staked down. Make sure to clean off any sharp points or edges on the sticks so that they don’t cause any cuts or holes in the tarp

I run the loop that’s on the stake up through the grommet or pullout and then run the toggle through the loop. This allows for a lot of the stress to be transferred over a bigger area. This is huge if you’re dealing with grommets as these are always the weakest points.

Adding the toggles allows for a stronger connection to the ground well also putting less stress on the tarp. It also allows a little free movement for the tarp which you want on those high windy days.

One last added benefit is that the toggles make it easier to pull the stakes out of the ground when it’s time to pack up camp.

I hope this little trick helps someone next time they’re setting up a tarp on a windy day. What tarp tips or tricks do you have? Do you camp using a tarp? What type of tarp do you prefer?

5 Items I Always Carry In The Wilderness

I wanted to write a quick post detailing the five items that I always carry with me in the wilderness.

Container

I either carry a stainless steel bottle, pot or a Grayl water purifier. Since water is so important to our survival, you want to make water procurement as easy as possible.

If the low temperatures over night will be above freezing, I generally always choose to carry my Grayl water purifier. This makes water purification fast and easy. Plus the water always tastes amazing.

If the temperatures will get below freezing at all, then I take either a stainless steel bottle or large bushpot for boiling my drinking and cooking water.

Cover

For cover, besides the seasonal relevant clothing I’m already wearing, I carry a poncho that can also be rigged up as a tarp shelter. I love having multifunctional gear as long as it is useful and works well for both intended purposes, which I believe the one I carry does.

Having the availability to make a quick shelter to get out of the rain, wind, snow or to just create a micro climate to warm up, is extremely beneficial. To be able to setup a quick shelter without the need of natural resources is a time and calorie saver. In the event of a true emergency, I’d want to be able to setup my shelter as quickly as possible and save any energy on gathering fuel for a fire and water purification. Also, if I were hurt, it would be extremely hard to build a natural shelter depending on the type of injury.

Cordage

I always carry a hank of 550 Paracord with me. It can be used for so many projects around camp from shelter building to an endless amount of camp projects. It can also be used for fishing, primitive trapping and gear repair, just to name a few. I also usually carry a 25’ piece of #36 bankline which is a great complimentary cordage to Paracord.

Fire kit

I carry a leather belt pouch I made out of stone oiled kodiak leather. It contains my extensive fire kit. My fire kit contains a flint and steel kit, char material in a tin, lighter, magnifying lens, quik tinder tabs, fat wood fuzz, a chunk of fat wood, fero rod, opinel pocket knife and some jute twine.

Knife

I always carry a good fixed blade knife that I know I can depend on. Having a good knife can make camp chores a lot easier, allow for game processing, opens up a lot of projects that can be done around camp to stay busy and keep the mind focused if lost and in an emergency situation. A knife is a great tool as long as care is taken and it is used in a safe manner.

This is not an extensive kit by any means, and these are not the only items I generally carry, but these five items are always with me. This is a basis for my wilderness wandering kit. I’m confident in this basic kit barring any serious life threatening injuries. I do carry varying first aid kits when wandering wild places.

What are your top five stay alive items that you always carry, whether urban or wilderness?

Two Hammocks Under One Tarp

Recently I was on a camping trip with my second oldest son. I setup our hammocks off three trees and was able to cover them both with one tarp. You can see from the images how it was all setup. I was using my Dream Hammock Thunderbird and my son was using his Warbonnet Outdoors Eldorado Hammock. We used a Warbonnet Outdoors Superfly Tarp to cover both in case it rained.

h3.jpg


h2.jpg


h4.jpg


h5.jpg

To keep the tarp ridgeline centered with the hammocks, I had to run a short paracord ridgeline between the two trees at our foot end of the hammocks. With the added tent pole mod on the tarp, it helps give you the added room for two hammocks. This setup kept us perfectly dry each time it rained. I’ve tried using other tarps over two hammocks and this is by far the best setup I’ve used. I had no worry about rain getting in, which I can’t say with other setups I’ve tried.

h7.jpg

As a nice extra, we used cheap battery-operated LED lights hung from our hammock ridgelines to be able to see at night well getting situated in our hammocks. They were nicer than having to use our headlamps (which I usually do) and having one bright light that only lit up in one direction.


h6.jpg

We had a great time and as always, slept well in our hammocks. Have you ever tried hammock camping? If so, what’s your setup? If not, do you think you’d like to try it out? Please feel free to leave a comment with your thoughts or answers to any of the questions.

h.jpg

Testing Winter Gear

Over Thanksgiving the nighttime temps were supposed to be in the single digits here in NY, so even though I was visiting family I still wanted to test some of my winter gear. I didn’t get my 0-degree rated over quilt from Hammock Gear until spring, so I was never really able to give it a good test. I figured this would be the perfect time. All Temps listed in this article are in Fahrenheit.

pack.jpg

Everyone else thought I was nuts wanting to sleep outside in those temps but all I could think about was testing some of my gear and honestly, I love how quiet and peaceful it is outside during the colder months.

So, I setup my DD Hammocks Superlight tarp. I placed my UST heavy duty reusable emergency blanket on the ground as my ground cloth.  I placed a foam pad down and then placed my Klymit insulated static V on top of that. I knew with that combination I shouldn’t feel any cold from the ground down to at least -10 or so.  I laid my 0 degree over quilt out and ran the sleeping pad shock cords around the sleeping pads so that the over quilt would stay put on top of the pads. It’s a nice handy feature for ground camping with an over quilt. I laid may Pathfinder wool blanket over everything just to keep everything safe and dry during the day. I wanted the wool blanket just in case the over quilt didn’t keep me warm.

tarp6.jpg

tarp4.jpg

tarp2.jpg

The first night went well. It only got down to 11 degrees overnight. I stayed warm all night. The only issue I had was that in the middle of the night the wind changed from blowing on the sides and back of the tarp to blowing right through the door opening. Since I had the wool blanket, I just threw it over top of everything to keep the wind from blowing in any holes between the sleeping pads and over quilt. The wool blanket did the trick. After waking up and remedying the wind issue I slept soundly the rest of the night. Since the temps never reached very low, I really didn’t view this night as much of a test.

The next night got down to 4 degrees overnight and I stayed toasty warm all night long. I even slept in until around 9:30 am so I’d say that was a success. Based on how warm I stayed I’m confident that this setup can get me down to at least -10 to -20. I think I can most likely get away with just the Klymit sleeping pad down to 0 degrees. I think the two pads together was overkill but who doesn’t like extra padding when ground camping?!

temp.jpg

me.jpg


muchboots.jpg

I’m looking forward to doing some more testing and fine tuning of my winter gear. Eventually I’m hoping to get up into the Adirondacks for some winter camping this coming winter. One thing I didn’t like about my setup was the tarp configuration. It looks neat and all but it’s a pain getting in and out off, not roomy at all and since it’s so tight inside, condensation that builds up overnight is constantly getting on clothing and bedding because its impossible to move around without touching the tarp. I’m just not a fan of this tarp configuration. I’d go with something a little roomier so that I’m able to move around with ease without worry of touching the tarp “walls”. This is in no way a reflection on the tarp. I like this tarp a lot.

What does your winter kit look like? What pieces of winter gear are a must have for you? What winter gear are you testing for the first time this winter? What are the lowest temps you’ve camped in so far? Thanks for reading and please let me know what your thoughts are on winter camping or if you have any great winter camping stories to share. Be safe out there and enjoy each changing season.

Tarp Shelter

The tarp I used for this shelter was a Warbonnet Superfly Tarp with the tent pole mod. I originally bought the tarp to use with my hammock because it has “doors” which help block wind and rain out. Plus, with the tent pole mod it gives me extra head room. I’ve used it plenty of times with my hammock, and love it for that use, but this was the first time on the ground. I decided to use it on the ground instead of one of my other tarps because of the doors to block the wind out and because it would be roomier for two people with the tent pole mod. This tarp worked out great as a ground shelter. We dealt with high winds that constantly changed direction and the tarp held up great and kept the wind out with the help of the “doors”.

This tarp in conjunction with UST’s heavy-duty emergency blanket as a ground cloth are a great combination for a winning ground shelter or tarp shelter. If you are on the fence about getting one of these tarps it is well worth the money in my humble opinion. I love this tarp for hammocking and now for ground dwelling as well. I will most definitely be using this for a ground shelter again in the future. What’s your favorite tarp or tarp shelter and why? Thanks for reading and remember to get out and enjoy some wilderness time.


786

Camping With My Dad

A few weeks ago I went on an overnighter with my dad. We both had new Deepwoods Rucks from The Hidden Woodsman that we wanted to test out and it had been many years since my dad has been able to get out and camp. He had gotten seriously hurt on a construction site when I was younger and it really took a toll on his body, which meant backpacking and camping and any of the outdoors stuff he loved doing were out of the question for a long time. It’s only been in recent years that hes been able to slowly try to get back into some of the outdoor activities that he loves. Since other plans I had that weekend fell through and instead of doing some side work, I texted him and said lets get out for an overnighter and cook some steaks over the fire. He replied with YES! LETS GO! So the planning ensued.

I knew the night time temps would be in the low 30’s with windchill around the low 20’s and since it was his first time back out in the woods in years, I decided to go to one of my favorite spots to camp that was maybe a 20-30 minute hike in so my truck would be close in case we needed any extra supplies for warmth. I gave him my 0 degree Hammock Gear over quilt to use and I used my 20 degree over quilt. We used foam pads with  Klymit insulated static V blow up pads over top so that based on the R-value I new we’d be good down to 0 degrees and we’d be comfortable since we both have back issues. I set up my Warbonnet Outdoors Superfly tarp since it has “doors” and I knew it was going to be very windy. We used reusable heavy weight emergency blankets as our ground sheets.

We camped near a large pond with a great view. It rained a bit after we got camp set up and stopped just as we started to cook our steaks over the fire. The steaks (Venison backstraps cut into steaks) and potatoes came out perfect and tasted amazing after being cooked over the fire. We enjoyed some time around the fire and headed to bed. We slept pretty decent all night. The wind gusts got going pretty high which concerned us because the trees creaked like crazy all night and we could hear some trees and limbs falling in the distance. The wind was constantly changing direction all night. Otherwise it was a pretty good night. We both got up around 4 am to go to the bathroom and I loaded up the makeshift fire pit with wood so that we’d have coals to get a fire going later that morning. After I got the fire going again and warmed my hands up, I headed back to bed for a few hours.

I think we ended up getting up around 8-8:30 am. There was a little bit of snow on the ground, on our tarp and on our packs that were hung on the trees. The low that night was 32 degrees with a windchill of 18 degrees. It was so windy when we got up that we both decided we’d just pack up and have breakfast when we got home instead of getting a fire going and trying to cook over it in the wind. Plus I didn’t want to have to worry about the fire being reignited after we left because of the high winds.

We enjoyed our hike out and had a great time. It was nice seeing my dad be able to camp again and enjoy the things he use to be able to. We had a fun successful trip. We ate great food, had a great time and slept pretty well. We only needed our rain gear for a few hours the night before. We both love our new packs. My dad will eventually upgrade his pack frame to the same one that I have because mine has much more padding and is very comfortable. My dad’s already looking forward to our next trip, and to me that always means your trip was successful when anyone you took out enjoys themselves so much that they look forward to the next trip.

Thanks for reading and enjoy the attached photos of our trip. What extra little things do you do to ensure you have a great trip? Heres a link to the video of our trip http://www.youtube.com/watch?v=7rbbY5vnuW0

2.jpg

3.jpg

9.jpg

8.jpg

7.jpg

6.jpg

12.jpg

11.jpg

10.jpg

14.jpg


13.jpg1.jpg

550 Para Cord 101

In the last 3-5 years 550 para cord has gained mainstream popularity. With a lot of survival gear designed out of 550 cord or incorporating 550 cord somehow, a lot more people are carrying it. Since the invention of 550 cord, which was originally made for and used in parachutes for the military, many outdoor enthusiasts have carried this cord for building shelters, lashing things together as well as many other things. Many people that were familiar with its strength have always kept some in their garage as well. 550 Cord is useful for so many applications that it is considered the duct tape of cordage. It wasn’t until “survival bracelets” became popular and became very fashionable, that many people became familiar with this type of cord. Many veterans that were familiar with 550 para cord because of their military service continued to carry and use 550 cord after they left the military just because of its usefulness.

I as well as many others have always carried some 550 cord in their packs well outdoors. 550 para cord is great because it is made of a synthetic material (nylon or polyester) and because of that it does not rot or mildew. This is great for water applications. Since I like to Kayak it’s great to be able to not worry about my cordage deteriorating because of water contact. 550 cord is affected by UV rays and will weaken with prolonged exposure to the sun. Dirt and oils, like the oils from your skin do affect synthetic materials as well. That is why climbers take very good care of their robes. After each climb they are washed, dried and stored in a dark place. This helps any synthetic cordage to last longer. I’m not telling you that you have to wash your para cord bracelet every time you wear it but remember the dirtier and older it is the higher the chance the cord will not be as strong when you use it. You also want to be careful around open flames or intense heat because 550 cord will melt. That is one of its weaknesses.

If you are buying 550 cord or any gear made out of 550 cord make sure that it says that it is made in America. All of the American cord is tested to meet the 550 lb limit and some of the cord even surpasses 550 lbs. The stuff coming from china is not tested to meet the 550 lb limit even though it is labeled as 550 cord. One of the local companies that I order my 550 cord from, they make 550 cord for our military, has tested Chinese para cord and most of it is failing around 150-200 lbs. You can use this cord if you want but don’t expect it to hold 550 lbs.

The great thing about 550 para cord is that, say you only have a two foot piece of cord, you can take that short piece, cut the melted ends and pull the seven inner strands out and now you have eight cords, two feet long. You will now have enough cord to tie the frame of a shelter together. You can also take one of the inner strands that you just took out of the outer sheath and unwind it so that it can be used for fishing line. There are tons of uses for 550 para cord. Here are just a few:

Making a Shelter                                              Attaching gear

Fishing Line                                                         Snares

Knife Lanyards                                                  Neck Lanyards

Bow Drill                                                              Shoe Laces

Making a Hammock                                        Fishing Lure

Lashing a Knife to a Spear                             Hanging Things around Camp

Tourniquet                                                         Gun Slings

Belts                                                                      Repairing Failed Gear

Equipment Handles                                        Color Coding Gear


I could go on and on about how useful 550 para cord is and all of its many uses but I’ll stop here.  550 cord will only be limited by your problem solving skills and or imagination. If you do not have or are not using 550 para cord I suggest that you get some and keep it in your bug out bag, backpacking bag, hunting bag, garage or anyplace you may be able to use it. I always carry 100 feet of cord in my backpack no matter what I’m doing. It is to useful not to have some on me at all times. What things do you use 550 cord for? Are you familiar with its strengths and weaknesses? All of the 550 cord gear in my store is made in America by Americans out of American made parts. You don’t have to buy from me but make sure you are buying quality para cord gear that is made in America out of American made parts.

A simple shelter

The fallen tree or debris shelter is one of the simplest survival shelters to make. If you find yourself stuck out in the wilderness with no man made form of shelter like a tarp or tent and there are no other natural forms of shelter, then knowing how to build this shelter could be very helpful and lifesaving.

First survey your surroundings. You can either use a fallen tree where the tree is still attached, about 3-4 feet off the ground, to the trunk. It should look like a triangle on its side. If you do use the fallen tree method, make sure the tree is secure and you are not in danger of the tree coming loose and crushing you. The method I recommend and use is first find a generally good level spot where you would like to make camp. Next, look for a good sturdy tree with some good branches that will be low enough for the entrance of your shelter. Now go find a log for the ridge of your shelter. Make sure it is long enough so that you will be able to lie down in the shelter when you are done building. I am 6 feet tall so I generally try to find a thick log or fallen tree that is about 9-10 feet long. If you cannot find a good log or already fallen tree then you will have to cut a small tree to fit your needs. Try to find everything you use on your shelter from already fallen trees if at all possible.

Now lean the log on the tree so that one end of the log is still on the ground and the other is resting on top of a thick branch where it ties into the main part of the tree. Lay the log in the notch of the branch and trunk. If you have some sort of cordage it wouldn’t hurt to tie the log off for safety sake. You will now want to go find sticks or branches that are about as thick as your forearm and lean those out along the log you have leaning against the tree. Make sure you have a good steep angle to help run water off in case of rain. If you weave some thinner branches or vines trough the branches it will help make it sturdy.

If you are in an area with evergreen trees you can begin thatching the roof with evergreen branches. Keep the butt end of the branch up and start along the ground and keep piling them on until you reach the ridge log. Place a layer of evergreen branches along the ridge so that they overlap each sidewall and close the ridge up.  Now just fill the inside with leaves or evergreen branches and move in for the night. You can also close in the front door with branches and leaves after you are inside. Make sure that you do have some vitalization though.

If you are not in an area with evergreens then you can supplement by building up piles of leaves and debris against the walls you built out of sticks.  Place some small branches on top of the leaves and debris to help hold everything together and then place more leaves and debris on top of those branches. Completely cover the two walls and ridge. The more layers of leaves and debris that you have the warmer the shelter will be and you will be less likely to get wet in a rain storm. Place a thick layer of leaves inside the shelter for bedding. Climb in and enjoy all your work.

In the winter you can also place snow on the outside walls and ridge for insulation and to cut out any wind that might be blowing. I recommend that you test out building one of these shelters in your own yard or wherever you might be able to. It is easier to learn from any mistakes you make now than when your life might depend on it. There are also many modifications that you can make to this shelter as well. You can thatch the walls with birch bark, add a tarp or Tyvek underneath the thatching to make the shelter more water resistant and you can also thatch the roof with moss. Have you ever built one of these shelters and what modifications if any did you use? As always build at your own risk and never stop learning and fine tuning your survival skills. You are only guaranteed to have your knowledge and skills in a true survival situation. You may not have any man made tools or supplies when you most need them. So go out and enjoy the wonderful place we call the great outdoors and test your survival skills.

Ripstop Nylon

Ripstop nylon is an awesome material. It does have some limitations though. It will melt if it comes in contact with flames, sparks or intense heat. Sunlight (UV) will over time wear on the fabric. Even with these limitations ripstop nylon is well worth looking at using for your many needs as an avid outdoors person. There are many different types of nylon fabric for sale. You can buy plain nylon fabric but it will be more susceptible to tares and holes. I prefer ripstop because if the fabric gets a hole or slight tare in it the ripstop sewing pattern helps to limit the hole or tare from getting bigger. That is a huge advantage.

There are many different weights available as well. I generally like to use 1.1 or 1.3 oz ripstop nylon for my projects. You can get ripstop nylon that is uncoated, coated with silicone, silicone impregnated or urethane coated. I like to buy the uncoated ripstop nylon and spray it with a waterproofer myself when I’m done. If you use the uncoated ripstop nylon it’s easier to find in your local fabric store.  For making a tarp for camping I would recommend using either one of the silicon coated ripstop nylons. I’m not sure how the uncoated nylon with waterproofer sprayed on it will hold up to an all out down poor. I have used the uncoated for tarps but have yet to be out in a down poor. Feel free to test it out though. Here is a site where you can buy any materials you might need for your project, if you are not able to find what you need in your local fabric store.

http://www.bearpawwd.com/fabrics_misc/fabrics_misc.html#rip1

They have a lot of good information on their site and if you don’t want to make something yourself you can just buy one of their products. I am in no way affiliated with the website and do not receive any money for recommending them. I have just found them very useful over the years. You will need small sharp needles for your sewing machine and Gutermann polyester thread works the best. I like to use “hot scissors” or a soldering iron to cut the fabric. This way your edges are sealed as you cut them. I cut on top of a piece of glass for safety purposes. I also like to use shock cord or 550 cord for my projects.

Here are some ideas for what you can make out of ripstop nylon. This list is by no means complete. It is just a list to get you started thinking about what piece of gear you could make instead of buying.

Ditty Bags (easiest thing to start with)              Lightweight Backpack or Day pack

Tarp                                                                 Sleeping Bag Cover

Tent                                                                  Hammock

Lightweight Shirt                                               Pants

Sleeping Bag (with added insulation)                Gaiters

Jackets (add insulation)                                     Backpack Cover


As you can see this is just a small list to get you started on your way to making some of your own gear. If you are not familiar with sewing I’m sure that there are plenty of YouTube videos out there that can show you how to use a sewing machine. Do your research first and learn how to use the sewing machine you have. If you don’t have a machine, check garage sales for a used one, craigslist or ask anybody you know if they have one you can borrow or buy. Many people have one but don’t use them, so you might be able to get a free machine or at least borrow one. If you want to buy a new one and have the money don’t let me stop you, but research the machines first and ask questions about the machine you are about to buy. Let the sales people know what you are planning on using it for.

Enjoy the journey to making your own gear and good luck! Always remember that it doesn’t have to look perfect, and it won’t at first, but you will get better with practice and time. As long as whatever you make is functional and works the way you want it to, who cares if it’s not perfect. It will have character and you’ll have a sense of accomplishment. Feel free to ask me any questions you might have and have fun. What gear do you intend on making over the next year?

Tyvek

If you are not familiar with Tyvek you need to get your hands on some. Growing up in the construction industry I’ve always had some at my disposal. It was designed and is used today as a vapor barrier for homes. If you drive by a newly constructed home that has not been sided yet, you will most likely see Tyvek wrapped around the outside of the plywood or chipboard. Tyvek is generally white and is stamped with the manufacturers’ logo. You can buy a roll of it at your local hardware store and it will last you a while. Before you go buying some, check with anybody you know that works on a construction site. They may have some they are throwing away that they may gladly give you for free. Contractors throw this stuff away all the time. I highly recommend you get your hands on some.

Tyvek can be used for many things. The nice thing about having a big roll of it is that you can cut it to fit your different or changing needs. One thing I use Tyvek for is a custom size ground cloth. It works perfectly. No more wasting money on expensive or heavy ground cloths that are going to get ruined with use. Tyvek can also be used as a temporary shelter. It does keep water out to an extent but is not completely water proof. I want to test spraying water proofing on it and see how it holds up in a down poor. I will let you know how that goes. Add some grommets and you can make a custom sized tarp. I know of one guy that made a sleeping bag bivy that looked and worked great.

Tyvek is noisy when working with it so if you are making something that you will be using in the woods, and you want it quiet, you will want to wash it first. Just run it through a cold rinse cycle once and then let it air dry. It will be much quieter and nicer to work with. I know of some people that have tried to die it after washing it once but I’m not sure how well that will work.

A Tyvek ground cloth in combination with a lightweight nylon impregnated ripstop tarp make the perfect shelter for your bug out bag or for those that like lightweight backpacking. This option is much cheaper and lighter.  It’s one I use frequently. So go buy yourself a big roll of Tyvek and make as many things as you can come up with. Have fun saving yourself a ton of money well making your own gear. Some ideas of what to make are a ground cloth, a custom size tarp, a sleeping bag bivy, a simple backpack, diddy bags and whatever else you can come up with. Enjoy and have fun. Thanks for reading and let me know what you made or came up with.