Long Term Food and Water Storage

If you’ve ever thought about food or water storage for emergencies, natural disasters, being more self reliant or to combat shortages at grocery stores then I’ve got a course for you!

This course was put together and is taught by Creek Stewart. He’s hosted many outdoors/bushcraft/survival shows on the weather channel. He’s a great teacher and he wants to help you finally take that first step into learning how to properly store food and water long term.

This course is perfect for these uncertain times. Learn how to be more self sufficient from the safety of your own home. Nows the time to take that first step into a more self reliant lifestyle. If you follow what’s taught in this course you’ll be able to rest easy well everyone else is panicking over empty store shelves. After you take the course, stop back and let me know what you thought about it. If you already store food and water long term, what tips and tricks have you learned that you don’t mind sharing?

https://www.outdoorcore.com/courses/how-to-build-a-long-term-food-storage-pantry-for-bug-in-survival?ref=ca0c6a

Quick Tip #9

Electrical conduit also called EMT is great for so much more than just running electrical wiring. I use it for simple cheap fence posts. With a 3’x200’ roll of chicken wire and 14, 10’ lengths of EMT you can make a decent size fenced in area for chickens and it won’t cost very much at all. I cut the EMT in half so that I end up with 5’ poles. Using a sledge hammer I pound the poles about 2’ into the ground and I place a pole every 8’. They pound in pretty easily since they are hollow. I add a self tapping screw at the top and bottom of each post to keep the fence in place and then add two zip ties to each post. This makes for a cheap and easy make shift fence. It’s easy to tear down and move to another area and the EMT doesn’t leave big holes in the ground or rust. You can also make simple tracking poles out of EMT and you can store simple survival items inside the poles. I find myself using EMT for a lot of different purposes around my home. It is a very versatile product that can be used for so much more than its intended purpose. What products do you use for things other than their intended purpose?

Raising Egg Laying Chickens

These days it’s becoming much harder to trust companies with the food we eat. Many companies refuse to label their “food products” or like most pizza shops blatantly refuse to divulge their ingredient lists. Many companies spend billions of dollars each year just so that they can keep their ingredients a secret. I’m sorry but to me that is a big clue to the quality of their ingredients and products. If any company can’t tell me what I’m consuming then they can forget my money. My health is more important than their bottom line.

In an effort to know what is entering our bodies, my wife and I try to grow as much as possible ourselves, and make most things from scratch. As you saw in a previous post we raise a specific breed of chicken for meat. We also have another breed that we raise as our egg layers. We raise Black Australorp chickens as our egg layers. We chose them because they tend to be an aggressive egg layer and they don’t mind being cooped up as much as some breeds, which is good since we live in New York. We order all of our chickens from Murray McMurray Hatchery, but feel free to check out other hatcheries. We have just had good luck with this hatchery.

We have fifteen hens and one rooster. We generally get 14-15 eggs per day. We would be fine with only 7-8 hens but some chickens will only lay eggs every other day instead of every day so I didn’t want us to run short. We just give any extra eggs to family or sell them.

There was no way I was going to spend a ridiculous amount of money for a tiny prebuilt coop so I built my own. I figured out how much room I needed for the amount of chickens we would have and it seems to have worked out well. My coop is 8’x8’ and is 7 ½’ tall. I built the coop like a tiny house and placed roosting poles about 3-3 ½’ off the floor so that the chickens would have a lot of room when they were cooped up during really cold weather. I hang the waterier and feeder near the door so that I don’t have to climb into the coop to feed or refill their water. I built an exterior nest box unit so that it is easy for egg collection. I also put tires on the coop so that I could move it whenever and wherever I want to. I’ve been told that I built a chicken Taj Mahal but I wanted a coop that would last for years instead of one that needed repairs yearly. Here are two pictures of my chicken coop.


chicken coop 2chicken coop


Now we enjoy fresh eggs everyday for breakfast as well as for use in our cooking. It’s nice to know exactly what our chickens are eating, knowing that they really are free range and knowing that they are actually living a decent life for a chicken. I do not heat the coop and they do just fine. The only thing I do is add a small 40 watt light so that they still get 14 hours of light throughout the winter months so that their egg production continues. During the really cold parts of winter I change their water twice a day since it freezes. This doesn’t seem to be a real problem until it gets below 10 degrees outside because they produce plenty of heat. I did insulate and wrap the coop with Tyvek to aid in heat retention. I made sure to add plenty of ventilation as well which is key to keeping them warm in the cold winter.

If you live in an area where you can raise chickens for meat or for eggs I highly recommend that you try raising at least one or two. Start small and work your way up to more. They are very easy to raise and take care of. Chickens are pretty neat to watch when they are free ranging and they are great for the land as well. Growing a garden and raising some chickens will help start you on your way to being self sufficient as well as knowing what you are actually eating. Do you raise chickens now? Have you ever thought about raising your own chickens for eggs or meat? I hope this post encourages you to try raising some of your very own chickens and have fun doing it.

Raising Chickens for Meat

Raising meat birds is very easy and if you are conscious about what is in your food, I recommend that you try raising some chickens of your own. I order all my chickens from Murray McMurray Hatchery. I have not had a problem with them and their birds seem to be of very good stock. I buy the XRocks and I order them with no vaccines or antibiotics. They are not genetically modified, they are a cross breed. They are crossbred so that they mature very quickly.  These birds are ready for slaughter in 6-9 weeks. I usually slaughter mine at 8 weeks. If you go too much longer they can start to die off or have health complications. You really don’t gain much by going over 8 weeks. They just continue to eat a lot but not really put too much more meat on.

You will want them in a brooder or some sort of enclosure with a 250 watt heat lamp for the first 3 weeks. I usually order 30 meat chickens at a time and I just took some scrape plywood I had lying around and built a pen 16”x4’x8’ and set it up in one of the spaces in my garage. I then spread out a bag of shavings on the floor. This way I could hang their food, water and heat lamp from the rafters and adjust them easily as the chickens grow. By having the chickens in the garage, they are safe from predators and there should be no cold drafts to worry about. It is also easy to clean up the garage floor when they move out. These chickens eat and drink like crazy so you will want a large feeder and waterier.  I ordered my feeder and waterier from Amazon because my local Tractor Supply didn’t carry any large enough.

After 3 weeks, if the weather is going to be decent for a few days, you can move them outside. I built a 3’x5’x8’ “chicken tractor”. You can see mine in the picture above this post. It only cost around $100. It could have been done a little cheaper. I used pressure treated 2’x2’x8’s to go around the base. I used regular 2’x2’x8’s for the rest of the framing. To save some money you could rip down some 2x4s but I was tight on time when I built mine. I used chicken wire for 3’ of the total length and metal roofing for 5’. This gives them plenty of room to get out of the rain or away from predators trying to reach in through the wire. This is based on Joel Salatin’s chicken tractor model. His are 10’x10’ so I just modified it down in size. My size works perfect for 30-40 meat chickens.

Once your chickens are moved out into the chicken tractor you will want to fill their food and water first thing and move the tractor just enough so that they are off of the ground that they were on the day before. This way they will have fresh grass and be off of their feces from the prior day. This setup works much better than free range for meat birds because it forces them to eat fresh grass and bugs daily. Meat chickens are very lazy and will not free range like egg layers will. This tractor will also protect them from predators. The top screened part of my tractor is hinged with locks on the front so that any predators cannot open it.  I hang the food back under the metal roofing so that if it rains the food doesn’t get wet. You will want to move the tractor before you fill up the food and water. Just slide a dolly under one end with a short piece of wood between the dolly and the top of the tractor to lift the tractor up a bit and then pull from the other end. It moves very easy. Once moved you can now fill the water and food up. If you have to get inside the tractor for any reason you are now standing on clean grass instead of the mess from the prior day.

Your yard will thank you for the fertilization. It doesn’t take long for your yard to recover from the chickens. You do not want to leave them on one spot for more than a day. About the last two weeks you will have to give them food and water in the morning and again when you get home from work. In the summer if it is a real hot and humid day you will want to prop the metal side of the tractor up a bit so that there is some air flow. I just stick a 2×4 under the back side where the metal is and it works well. Just remember to take it out before it gets dark so that predators can’t get in.

When the chickens are ready for slaughter you can either, load them up and pay to have someone else slaughter them for you, or you can slaughter them yourself. I slaughter them myself. This way it saves me money and now I am in charge of how clean everything is. As well as how well the bird is cleaned out and plucked. I feed my chickens locally grown non medicated organic chicken feed. This way I know what they are eating and what they are made of. My last batch of 30 birds yielded around 175 lbs total after slaughter. They are like small turkeys. The meat has so much more flavor and you don’t have to worry about any chemicals ever touching the meat. Its nice knowing what I’m feeding my family is safe and healthy.

Once you have a chicken tractor built it really is easy to raise chickens. I think it only took 5-10 minutes per day until they were ready for slaughter. It takes two people about 3-4 hours to slaughter 30 birds. I’m sure somebody that slaughters chickens everyday could do it faster but this is my average.

It is getting harder to know what is really in our food supply these days and if you are anything like me you can’t afford to go out and buy all organic meat to feed your family but you can grow it much cheaper. You will also feel less dependent on others to supply your family’s food. Chickens are one of the easiest animals to raise for food. Once you taste the meat from the chickens you raised you’ll never want a store bought chicken again. Feel free to ask me any questions you may have and let me know if you want specs for my chicken tractor. I will try to help in any way I can. What is stopping you from raising some chickens of your own (Besides local town laws)? I hope this encourages you to tryout raising your own chickens and becoming more self-reliant. It’s only a 6-8 week commitment so why not try it out at least once?

Review of Dash Yogurt Maker

Review of Dash Yogurt Maker

This is a review for the Dash DSY007CM STAINLESS 7 Jar Home Yogurt Maker w/ One Year Warranty. My wife and I have wanted to make our own yogurt for a long time. We did test making it without a yogurt maker and it can be done but we had a hard time having consistent temperatures for the yogurt and it always came out very runny.  So we finally decided to invest in a yogurt maker.

One of our stipulations was that we wanted the yogurt to be made in glass containers instead of plastic containers. That limited our options big time. I also went online and read a ton of reviews. I found that one of the brands had a common problem running through all their lines of yogurt makers. The heating element would go bad in a short amount of time and would get to hot, which would in turn kill the bacteria. You would end up with soup instead of yogurt. We definitely didn’t want that.

So after doing a search for yogurt makers, and reading a ton of reviews, up popped the Dash yogurt maker. I liked that it used glass jars and as I began reading all the reviews I began to realize that this was the yogurt maker for us. So we ordered one. It only cost us $43.15 with free shipping from Amazon. I didn’t think that was a bad price at all.

Well we received it and couldn’t wait to make some yogurt. The first batch came out soupy but my wife realized it was her fault because when she was checking the temperature of the mixture, she did so without stirring so she ended up overcooking some of yogurt mix. You need to be very careful about not over heating the yogurt mix. Since then every batch has been amazing. I can’t begin to tell you how wonderful our yogurt tastes. The wonderful thing is we know what is and isn’t going into our yogurt. We use organic milk for our yogurt. No preservatives and no artificial flavors. We like to add our favorite fruit, a spoonful of homemade jelly or some granola, although the yogurt does taste good enough to eat all by itself.
So far we have not had one single problem with this yogurt maker. Its works exactly like it’s suppose to with no problems at all. The only minor issue I do have is the amount you are able to make. We have a family of six and we love our yogurt. I wish that they made this yogurt maker twice the size that it is. As nice as that would be and as convenient as that would be I’m not sure if that might affect the quality of the yogurt or the possibility of it not thickening. We overcome this slight issue by getting extra jars and making more batches consistently.

Out of a possible 5 stars I give it 4.9 stars. Only because I wish it made larger quantities does it not get a 5. I do highly recommend this machine if you are contemplating making your own yogurt. It’s always nice to know what you are eating and putting into your body. The more things you can make at home for yourself the better off you’ll be and hay its always more satisfying making your own food from scratch and eating it to. Let me know if this review helped you in any way and if you enjoy making your own yogurt. What kinds of things do you add to your yogurt and why?

Trail Recipes: Lunches

I’ll start off by saying that these are just a few lunch ideas that I use. These are not my only lunch “recipes” but may give you some extra ideas for your own trail lunches. In general I don’t like to stop for too long a period of time when I’m stopping for lunch. Because of that I try to eat something that doesn’t need to be warmed up or cooked unless it is going to be cold and I know in advance that I will want something to warm me up.

For quick lunches I like to pack homemade flour tortillas or homemade dinner rolls. I keep these at the top of my bag so that they don’t get crushed. Bread products do actually last for awhile on the trail. It just depends on how hot it is going to be. I then pack peanut butter packets, jelly packets and sometimes some honey. The honey is also great to have to sweeten your tea at night or possibly coffee. I squeeze these onto a roll or tortilla shell and I’ve got a sandwich. This way I can also keep hiking well eating if I would like. I bring a small baggy to place the used packets of peanut butter, jelly and honey in so I don’t end up with a mess in my pack. Sometimes I will also bring tuna fish that is in the pouches and mayonnaise packets so that I can make a tuna fish sandwich. Here are the recipes for the tortilla shells and dinner rolls I use.


DINNER ROLLS

3 ½ to 3 ¾ cups all-purpose or bread flour

¼ cup sugar

¼ cup butter, softened

1 teaspoon salt

1 package regular or quick active dry yeast (2 1/4 teaspoons)

½ cup very warm water (120-130 degrees)

½ cup very warm milk (120-130 degrees)

1 large egg


1) Mix 2 cups of the flour, the sugar, ¼ cup butter, salt, and yeast in a large bowl. Add warm water and warm milk and egg. Beat with electric mixer on low speed 1 minute, scraping bowl frequently. Beat on medium speed 1 minute, scraping bowl frequently. Stir in enough remaining flour to make dough easy to handle.

2) Place dough on lightly floured surface. Knead about 5 minutes or until dough is smooth and springy. Place dough in large bowl greased with shortening, turning dough to grease all sides. Cover bowl loosely with plastic wrap and let rise in a warm place about 1 hour or until double. Dough is ready if indentation remains when touched.

3) Grease rectangular pan, 13x9x2 inches, with shortening.

4) Gently push fist into dough to deflate. Divide dough into 15 equal pieces. Shape each piece into a ball; place in pan. Brush with butter. Cover loosely with plastic wrap and let rise in warm place about 30 minutes or until double.

5) Heat oven to 375 degrees.

6) Bake 12-15 minutes or until golden brown. Serve warm or cool.


FLOUR TORTILLAS

4 cups all-purpose flour, plus additional for the counter

2 teaspoons salt

1 teaspoon baking powder

2 Tablespoons unsalted butter, cut into 1/2 –inch pieces

4 Tablespoons nonhydrogenated vegetable shortening or lard, cut into ½-inch pieces


1) Combine the flour, salt, and baking powder in a large mixing bowl. Add the butter and shortening, and rub them into the flour mixture with your hands until you have pea-size lumps. Slowly add 1 ½ cups of warm water to the mixture, tossing with your hands as you go. Add an additional 1 tablespoon of water at a time (but don’t use more than 4 additional tablespoons) until you have a slightly sticky dough. Lay a clean, damp dish towel over the bowl. Let the dough rest for 10 minutes.


2) Flour the counter and divide the dough into 16 balls, each about 3 inches in diameter. Cover the balls with the damp towel and let rest for 5 minutes. Start heating a dry skillet on the stove over medium-high heat. (If you have two skillets, use them both.)


3) Use the rolling pin to roll out your first tortilla to 8 inches in diameter and 1/16 inch thick. Put it in the skillet and cook for 1 minute on each side, or until it is bubbly and starting to brown. Use the spatula to remove the tortilla from the pan. Repeat with the other balls of dough. Serve immediately or store covered, in a warm oven or under a warm, damp cloth until ready to serve.

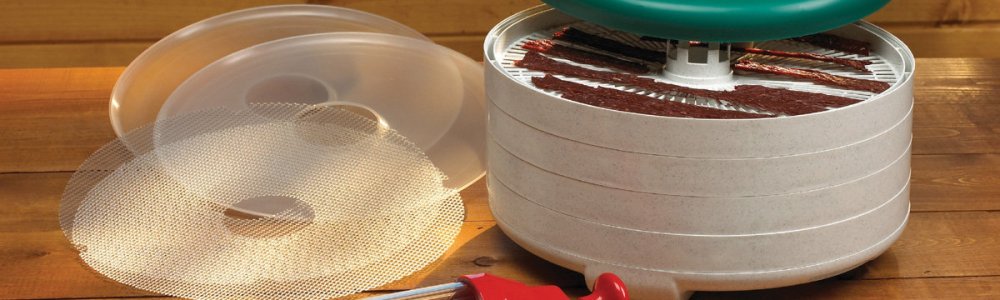
For a warm meal I take a Ziploc bag and place 1-2 servings of instant potatoes in it. Then I add enough powdered milk to cover the needed milk for the instant potatoes (dependant on how many servings of instant potatoes you use). If you want butter in the potatoes just bring some butter packets to use. Now just add some dehydrated vegetables and some dehydrated meat of your choosing (or maybe TVP if you are vegetarian) and you’re all set. Just add to some hot water and allow it to sit for 5-10 minutes and you’ve got a wonderful warm lunch. I also use this for my dinners once in awhile.

Feel free to use these recipes or come up with your own but just know that you are not stuck having to buy trail food from your local sporting goods store. I do use mountain house meals once in awhile but I can’t imagine the cost of eating those strictly well on long hikes and they are generally full of sodium. I like to save money and I rather enjoy putting my own healthier meals together. I hope this post helps encourage you to come up with your own trail meals instead of settling for prepackaged. What meals do you make for lunch well on the trail?

Natural Soap and Lotion Bars

These days a lot of people are trying to go back to making a lot of their own household products instead of relying on companies that fill their products with all kinds of extra things they don’t need and that might be harmful to our health. My family and I are no different. We try to make as much as we can on our own. Most of our food is made from scratch and if I might add, tastes so much better and is not filled with preservatives and dyes. Yes we do eat things once in awhile that we know are not the best but we try to keep that in moderation.

With all that said here are a couple recipes, one for soap and one for a lotion bar that we like and use. They are simple but they work great and we know they are safe to even use on our 1 ½ year old son. We did buy ph test strips so that we could test the soap to make sure it had sat long enough and was now safe to use.

Here is where we found our soap recipe;  http://frugallysustainable.com/2013/05/how-to-make-old-fashioned-lye-soap-for-use-in-homemade-laundry-detergent-general-household-cleaning-recipes-and-as-a-poison-ivy-treatment/ . This is a great site that my wife uses often. I highly recommend that you check this site out. We do not add any essential oils to our soap for a few reasons. First, we wanted to keep it simple and fairly inexpensive.  Second, we have small children and didn’t want to worry about skin reactions to essential oils. Third, by not adding any scent, I can now use this soap during hunting season and have no need to buy special, expensive soaps geared toward hunters. What a savings! We also noticed that our skin does not dry out like it did using store bought soaps. There is a drastic difference that I can’t state enough. We use coconut oil, olive oil and shea butter for the fat content instead of the other recommended fats. It works for us but you’ll have to find what works for you.

Here is the lotion bar recipe we use:

1 part coconut oil
1 part Shea, cocoa, or mango butter
1 part beeswax

Optional:
vitamin E oil (1 tsp/ 1 part other ingredients)
50 drops essential oils

Melt oil, butter (pick 1 or use a combination), and beeswax together over low heat. When completely melted remove from heat and add vitamin E oil and essential oils if using. Pour into molds and let cool.

* if 1 part = 1 cup, recipe makes ~12 bars
* silicone baking molds work well

This lotion bar works great. Our kids love it and it’s safe for them to handle. We use it on our 1 ½ year olds face when it gets chapped and dried out. He likes holding onto the bar and rubbing it on his cheeks by himself. By morning his cheeks look great. It’s so nice to know what is in the products that we are using and putting on our kids’ bodies as well as our own.

These are just two simple recipes that we use in our home that work great for us. I hope that maybe they will help you too or get you inspired to make some of your very own soaps and lotions as well as many other products. As always, do everything at your own risk, follow directions, take precautions and be safe when dealing with any chemicals (the lye in the soap recipe). What products do you make in your home that you absolutely love? Thanks for reading and enjoy making your very own soap and lotion bars.

Review of the Open Country 500-Watt Food Dehydrator And Jerky Kit

I purchased my Open Country 500-watt food dehydrator and jerky kit a little over a year ago from my local Gander Mountain store. I will start out by saying I love this dehydrator. I use it mostly to make venison jerky and to dry fruits and vegetables. My wife did try making the fruit rollup recipe and it didn’t work. She said she may have messed something up though, and we haven’t tried to make it again. Since the dehydrator works excellently for everything else I am not going to hold it responsible for the outcome of the fruit rollup recipe until we try it again.

I use ground venison that I grind myself, for all of the jerky I make. The Jerky Gun that comes with the dehydrator works wonderfully. Once your meat is ground up, all you have to do is add the seasoning and cure and let it sit in the refrigerator for 24 hours. This kit does come with some sample seasoning and cure as well as different size jerky tips. These samples had some really good flavors. When you’re ready, all you do is spoon some of your seasoned meat into the jerky gun until it is full. Then close the jerky gun up and squeeze strips out onto the dehydrator trays until all the trays are full. Set the dehydrator to the recommended temperature and you’re good to go. Your house will smell wonderful well the jerky is drying. For me it generally only took 3 ½ – 4 hours until the venison jerky was done. Everybody that has tried my jerky can’t say enough about how much they love it. My kids eat it like candy. The nice thing about making jerky with ground meat instead of solid pieces of meat is that it dehydrates much quicker and it is much easier to chew. It almost melts in your mouth.

The dried fruits and vegetables come out perfect. We like to use the dried fruits and veggies in meals that we bag up for backpacking and camping trips. This is a much healthier way to make your own lightweight meals and snacks for the trail.

So far we have not had any mechanical problems. I also love that this dehydrator is made right here in the U.S.A. You can’t beat that! If you’re looking for a good simple dehydrator and don’t want to spend too much money, then I recommend that you look into buying one of these dehydrators.

I do toy around with drying things using the heat from the sun as well as smoke from a small fire but this is just a modern convenience that I love using, especially during hunting season. Here are two places where you can purchase your very own Open Country Dehydrators.

$79.99 at Gander Mountain

$73.13 + $15.12 (shipping) on Amazon

Feel free to ask me any questions that you might have. I will try to answer to the best of my ability. I hope this review was helpful to somebody. If you don’t dehydrate your own fruits and vegetables or make your own jerky yet, I highly recommend you try. It’s very satisfying as well as fun. Thanks for reading and feel free to leave a comment or a like.

Key Features

  • Adjustable thermostat
  • 1.36 cu. ft. expandable capacity
  • ABS construction
  • Converga-Flow drying action
  • Includes jerky gun and other accessories

Product Description

Make your own beef jerky or trail snacks with the Open Country 500-Watt Food Dehydrator and Jerky Kit. Constructed of durable ABS, this electric dehydrator comes with four trays and a thermostat that is adjustable from 95°F to 155°F. Thanks to the top-mounted fan with Patented Converga-Flow drying action, there’s no need to rotate the trays. Great for hunters, campers, and backpackers. 1.36 cu. ft. drying capacity. Includes two Clean-A-Screens, two fruit roll sheets, jumbo jerky gun with three tips, jerky spice, cure packets, and instruction/recipe booklet. 14″H x 12″W x 14″D. One-year limited warranty.